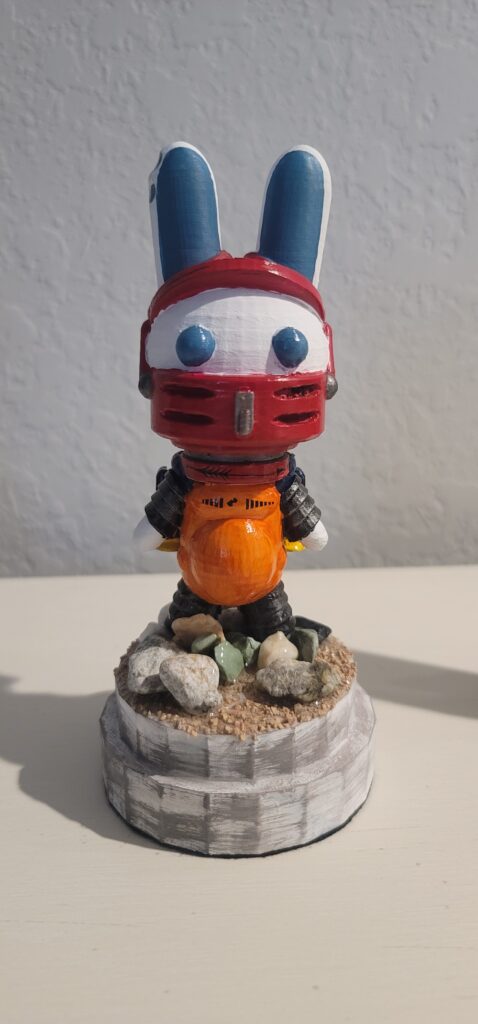
TITLE: Space Hare
MEDIA: 3D Print
SOFTWARE: Autodesk Tinkercad
HARDWARE: Windows 11 Pro, Bamboo Printer
SPECIFICATIONS: 4x5in, Plastic Filament
CLASS: FMX 213 3D Printing and Modeling
PROFESSOR: Stephen Dinehart
SEMESTER / TERM: SP 24
INSTITUTION: University of Tampa
DESCRIPTION: I play Destiny 2 and they released at the time, a bobble head of the Jade Rabbit. Course I didn’t want to pay the price they offered, so I made my own! Space Hare! This is my all time favorite piece as I used hobby paints with glaze to add to the shiny affect of the body’s base. It’s pretty heavy, as I also 3D printed the base as well.

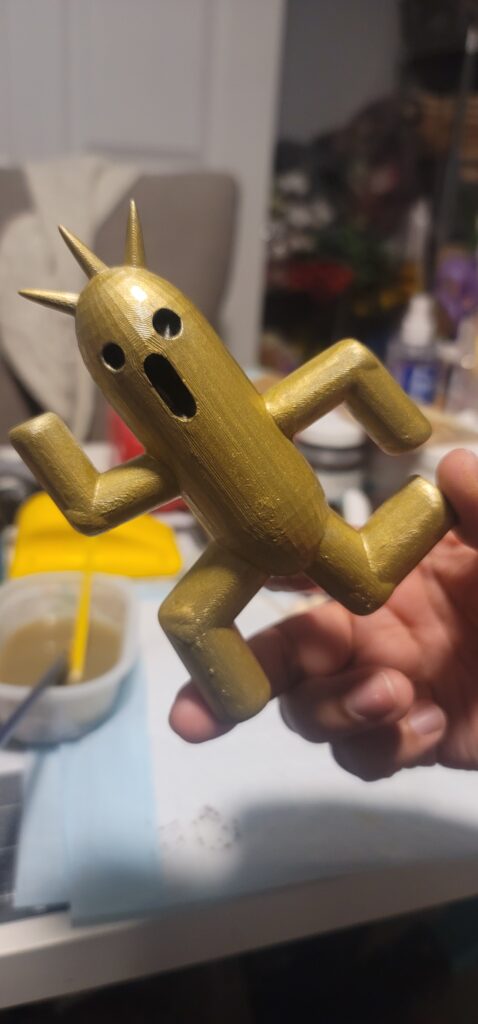
TITLE: Golden Cactuar
MEDIA: 3D Print
SOFTWARE: Autodesk Tinkercad
HARDWARE: Windows 11 Pro, Bamboo Printer
SPECIFICATIONS: 4x5in, Plastic Filament
CLASS: FMX 213 3D Printing and Modeling
PROFESSOR: Stephen Dinehart
SEMESTER / TERM: SP 24
INSTITUTION: University of Tampa
DESCRIPTION: As a Final Fantasy fan I had to make the Cactuar from the game, and specially the rare one at that as well! This one is pretty light as it didn’t fill the inside. I used resin for the mouth and eyes, using black dye. I used regular hobby paint for the body, I could have used spray paint, but the gold I had really gave off a better texture.

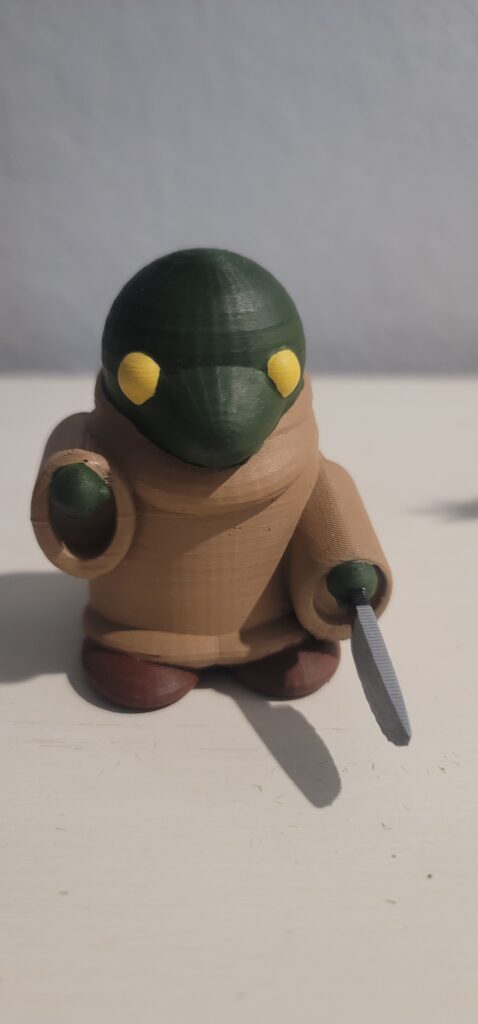
TITLE: Tonberry
MEDIA: 3D Print
SOFTWARE: Autodesk Tinkercad
HARDWARE: Windows 11 Pro, Bamboo Printer
SPECIFICATIONS: 4x5in, Plastic Filament
CLASS: FMX 213 3D Printing and Modeling
PROFESSOR: Stephen Dinehart
SEMESTER / TERM: SP 24
INSTITUTION: University of Tampa
DESCRIPTION: Despicable creature, but I like them. I wanted another figure that isn’t really sold anywhere. It printed out perfectly using the “tree” method of supports so they were easy to take off. Only issue though was that he came with a lantern, because it was so fragile, it popped off and got lost in the abyss that is my craft room.

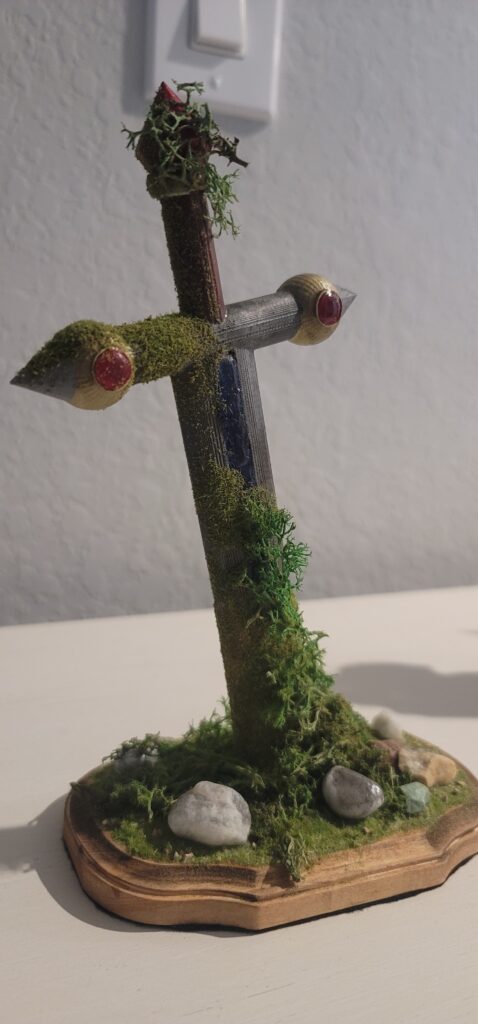
TITLE: Excalibur
MEDIA: 3D Print
SOFTWARE: Autodesk Tinkercad
HARDWARE: Windows 11 Pro, Bamboo Printer
SPECIFICATIONS: 4x5in, Plastic Filament
CLASS: FMX 213 3D Printing and Modeling
PROFESSOR: Stephen Dinehart
SEMESTER / TERM: SP 24
INSTITUTION: University of Tampa
DESCRIPTION: I love King Arthur and the Knights of the Round Table, I made a sword in reverence of that story. But not of a new blade, but a lost forgotten relic of the past. I used clay to hold it in place, while also using resin and insta-glue. Moss and hobby grass were also used to give that realistic affect.

TITLE: FF7 – Cloud’s Buster Sword
MEDIA: 3D Print
SOFTWARE: Autodesk Tinkercad
HARDWARE: Windows 11 Pro, Bamboo Printer
SPECIFICATIONS: 4x5in, Plastic Filament
CLASS: FMX 213 3D Printing and Modeling
PROFESSOR: Stephen Dinehart
SEMESTER / TERM: SP 24
INSTITUTION: University of Tampa
DESCRIPTION: I’m sure people are seeing a pattern, but this is Cloud’s Buster Sword from Final Fantasy 7, one of my first prints using Tinkercad. This one was fun, but it wasn’t easy taking off the supports as this one didn’t utilize the tree method as that was alter update with the machines. I wanted to make this look worn, so i used my Dremel to make cuts within the blade and used 3 types of spray-paint to get the dirty metal look. I had some faux leather, and used that as the wrapping of the spine.

TITLE: FF7 – Disney World Diorama
MEDIA: 3D Print
SOFTWARE: Autodesk Tinkercad
HARDWARE: Windows 11 Pro, Bamboo Printer
SPECIFICATIONS: 4x5in, Plastic Filament
CLASS: FMX 213 3D Printing and Modeling
PROFESSOR: Stephen Dinehart
SEMESTER / TERM: SP 24
INSTITUTION: University of Tampa
DESCRIPTION: My mother used to work for Disney Word as a vacation planner and I want to make a collage of areas for Disney through 3D printing. Epcot, Mickey, Mickey head, Monorail, and the Magic Castle. I used mainly hobby paints for all the colors. Unfortunately the filament for these were a bit thin, as taking off the supports broke a few parts of all pieces except Epcot. I managed to fix them using insta- glue. But the whole piece at the end worked out perfectly.